In the article, I will go over some basic shape and contour detection using Python3 and OpenCV to identify a lake in a given screen capture from Google Maps.
The source code for this article can be found here. This was written on the 28th of July, 2018.
Goal
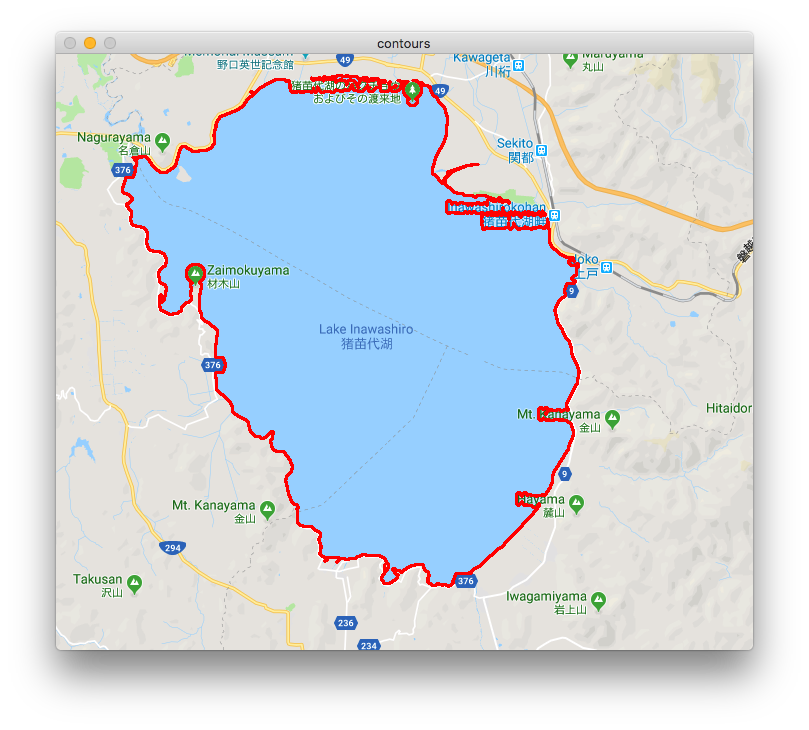
The goal is to detect the largest body of water and calculate the radius and approximate area, given screen capture from Google Maps. The article introduces some code that, given a screen capture, detects the largest body of water and draws a line around the edge:
Setup
I will use Python3 and OpenCV3. There are many ways to install Python3, I used conda. I installed OpenCV using homebrew by running brew install opencv.
To check if opencv was installed, create a detector.py script and add the following:
import cv2 as cv
import numpy as np
print(cv.__version__)
print(np.__version__)
And run with python3 detector.py. My output is:
3.4.2
1.15.0
Prior to the above output, I got an error regarding numpy. The fix was to reinstalling numpy using homebrew.
Basic Thresholding using inRange
The next step is to apply a threshold, and get rid of the data we are not interested in. Since we are using Google Maps, lakes are always the same shade of blue, which makes things simple.
Lakes have an RGB color of [170, 218, 255]. OpenCV uses a different ordering, BGR.
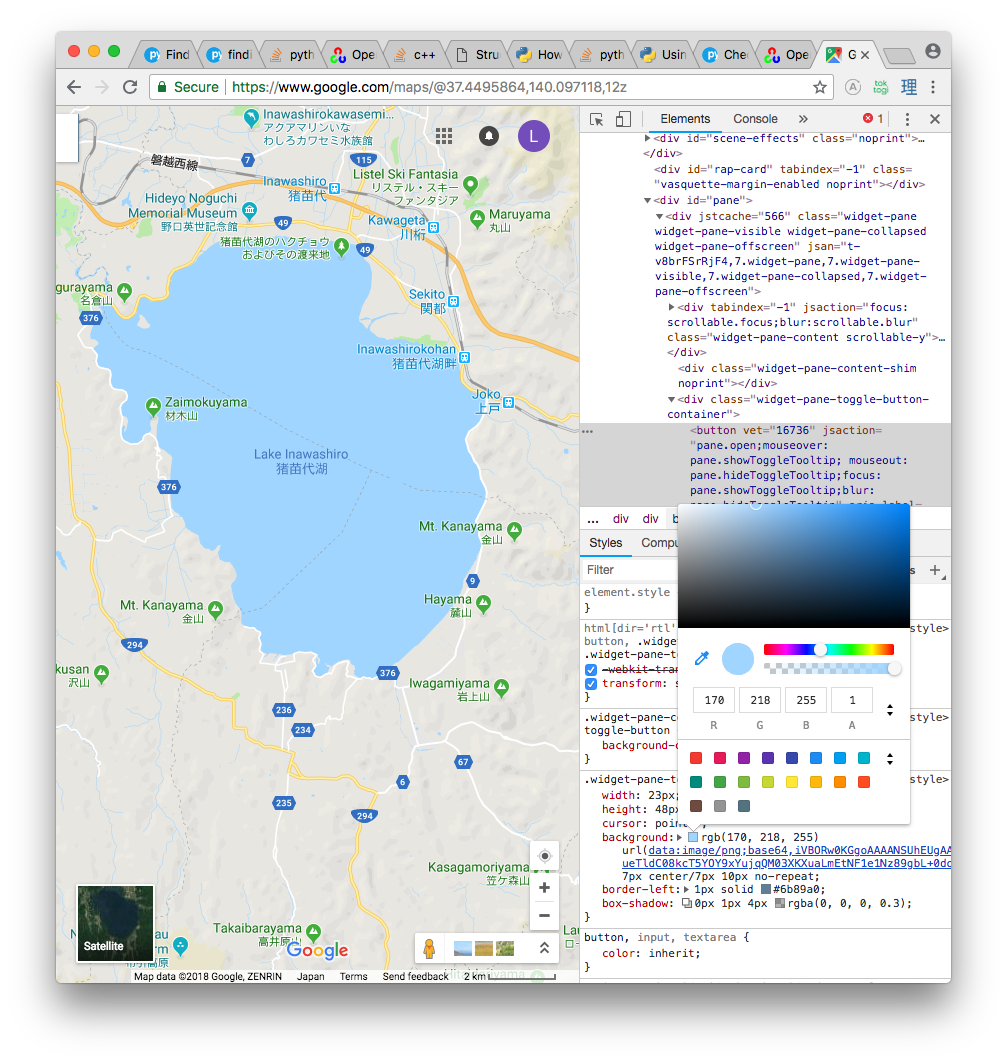
We will use cv.inRange function, which takes three arguments: an image, a lower color range, and an upper color range. The documentation is here. Based on trial and error, I found +-10 for the ranges work well.
Update the script:
# Color of a lake [blue green red]
BGR = np.array([255, 218, 170])
upper = BGR + 10
lower = BGR - 10
Now add two functions: read_image, to get the image we will be operating on, and find_mask, which applies the thresholding with inRange.
def read_image(path):
    return cv.imread(path)

def find_mask(image):
    return cv.inRange(image, lower, upper)
Before displaying the thresholded image, it’s good to understand what cv.imread returns. Add the following code:
if __name__ == "__main__":
    image = read_image("pond.png")
    print(len(image), len(image[0]), image[0])
    key = cv.waitKey(0)
I saved my screen capture as “pond.png”. Running the above code with python3 detector.py prints the following:
596 697 [225 230 232]596 is the height of the image, or the number of rows. Each row in an array containing 697 values, where each value is a 1x3 matrix contains [B, G, R] values. So an image is just a collection of BGR pixels.
inRange is similar, however instead of each pixel being mapped to a BGR value, is it simply assigned a value of 0 or 1 - whether or not it is between the threshold.
Try rendering the mask with this code:
if __name__ == "__main__":
    image = read_image("pond.png")
    print(len(image), len(image[0]), image[0][0])
    mask = find_mask(image)
    print(len(mask), len(mask[0]), mask[0])
    cv.imshow("Mask", mask)
    key = cv.waitKey(0)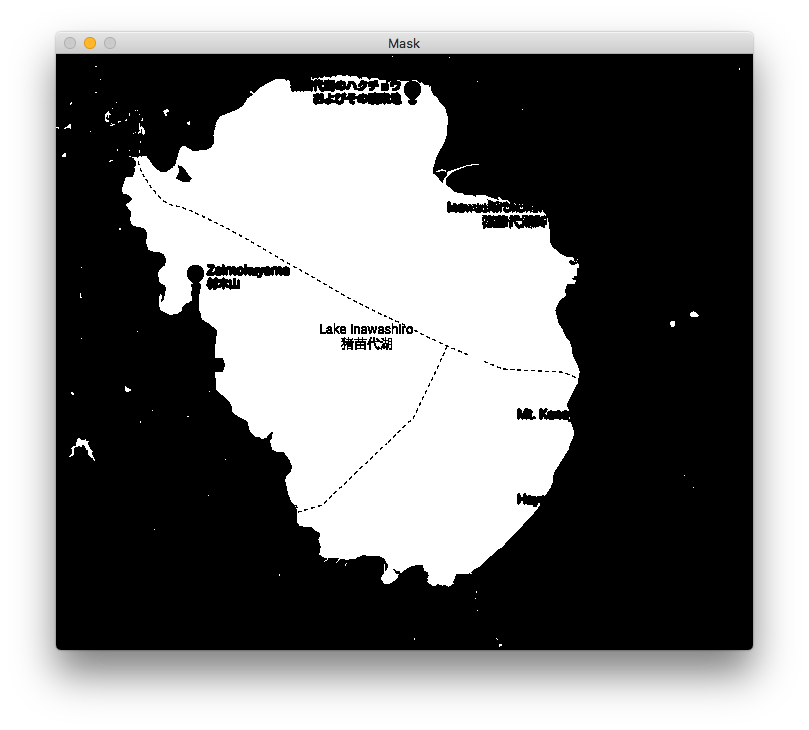
The output confirms inRange returns an array of 0 or 1 for each pixel:
596 697 [225 230 232]
596 697 [0 0 0 0 0 0 0 ...... ]
Finding Contours with findContours
OpenCV has a findContours function which can find edges in a binary image. We have a binary image - that’s why we created the mask. Read about findContours in the documentation here. The arguments are:
image: the binary image to use.findContoursmodifies the image, so we should pass in a copymode: the contour retrieval mode. The modes are described in the documentation. We are focusing on the largest area, so the best fit for this problem isCV_RETR_EXTERNALmethod: the contour approximation method. Again, described in the documentation. I don’t really understand which is the best fit for this problem, so I just usedCHAIN_APPROX_SIMPLEsince this is a simple problem and that method has simple in the name.¯\_(ツ)_/¯
Now we know about findContours, we can write the following function:
def find_contours(mask):
    (_, cnts, hierarchy) = cv.findContours(
            mask.copy(), cv.RETR_EXTERNAL, cv.CHAIN_APPROX_SIMPLE)

    print("Found %d black shapes" % (len(cnts)))
    return cnts
findContours returns three values. The first appears to be the image modified by findContours, which we don’t really need. The second is the contours that were found. The last is the hierarchy, which contains information about the image topology. I don’t fully understand what this can be used for yet. We only want the second value, cnts.
Running the find_contours function and passing in the mask from earlier prints Found 93 black shapes. This is counting all the small bodies of water, or other blue pixels, in the image. Not ideal for now. We will fix this soon.
Drawing Contours using drawContours
Let’s go ahead and create a show_contours function to visualize the 93 contours, using OpenCV’s drawContours function, described here. The arguments are:
- image: the image to draw on
- contours: an array of contour to draw. A contour is an array of points
- contour_index: the index of the contour to draw. For now we will pass -1, which draws all the contours
- color: the color to draw the contours. I will use red:
0, 0, 255 - thickness: the thickness of the contours drawn. I found 2 was a good number
Now we know the parameters, we can implement show_contours:
def show_contours(contours, image):
    cv.drawContours(image, contours, -1, (0, 0, 255), 2)

    cv.imshow("contours", image)
Using this with find_contours gives us the following:
contours = find_contours(mask)
show_contours(contours, image)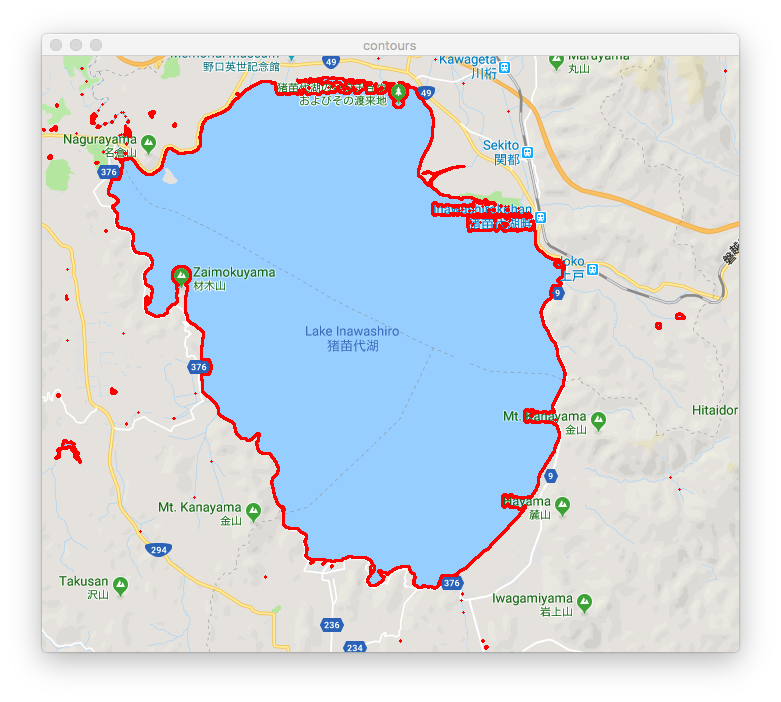
Extracting the Largest Body of Water
We have 93 contours, as shown above in the image. We only want the largest one, which is the one with the most points. Add a main_contour function:
def get_main_contour(contours):
    copy = contours.copy()
    copy.sort(key=len, reverse=True)
    return copy[0]
We simply sort the contours by length and return the longest one. Bringing it all together:
if __name__ == "__main__":
    image = read_image("pond.png")
    mask = find_mask(image)

    contours = find_contours(mask)
    main_contour = get_main_contour(contours)
    show_contours([main_contour], image)

    key = cv.waitKey(0)
Great.
Conclusion
This article described:
- how to use
inRangeto threshold and make a mask - finding contours using
findContoursand the arguments it takes - showing the contours with
drawContours
This was my first time doing image recognition in a long time. My previous experience was using OpenCV with C++, and I am impressed at how much easier and more approachable it has become with the Python bindings. I learned a lot reading Py Image Search, and it is a great resources web developers looking to try out Python and image recognition.
The source code for this article can be found here.